Every so often I’ll crawl into an attic without any attic bracing. Usually these are older home built in the 30’s through the 50’s however I’ve seen inadequate attic bracing on homes of all ages. Let’s start our discussion by looking at the proper way to brace an attic. Check out the pictures below.
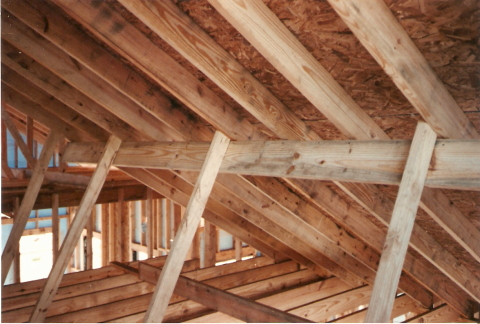
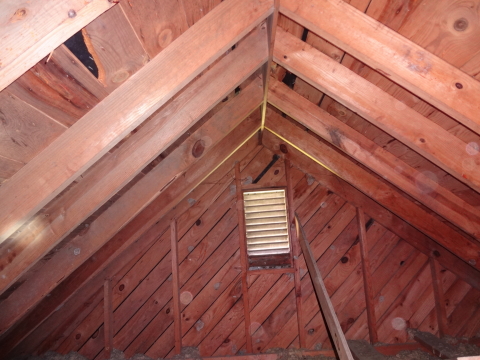
Example of proper attic bracing technique.
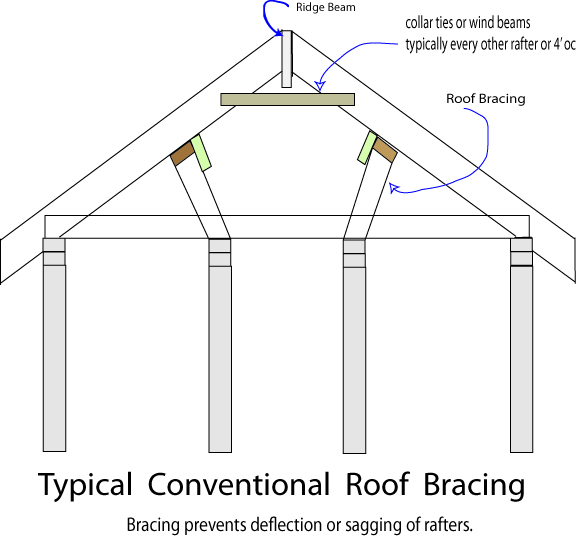
In this picture we see proper attic bracing technique. The purpose of attic bracing is two fold. First it takes some of the sag (deflection) out which must not exceed the allowable limit. Second it helps to straighten the roof plane (if done properly). They are usually placed as close as practical to the center of rafter. On the ceiling joists you can see a catwalk installed. A catwalk is a 2×4 nailed to the top of the joists with a 2×6 nailed perpendicular to that. It is used to straighten and laterally brace the ceiling joists.
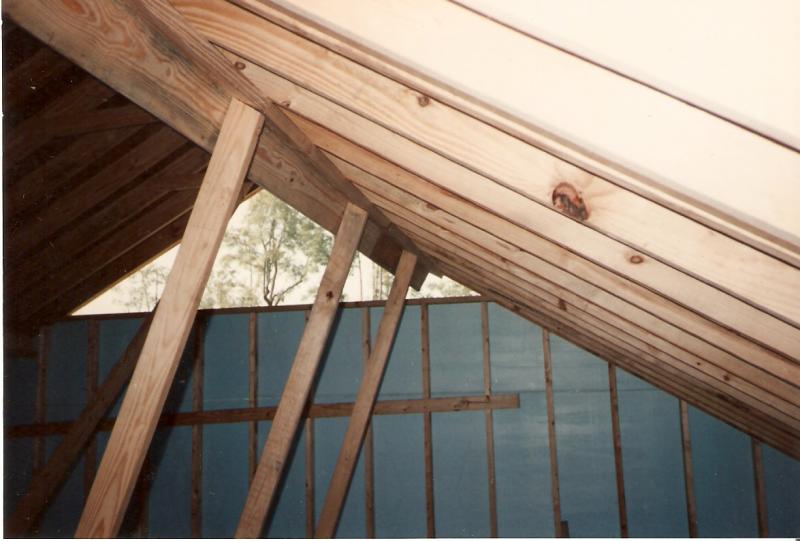
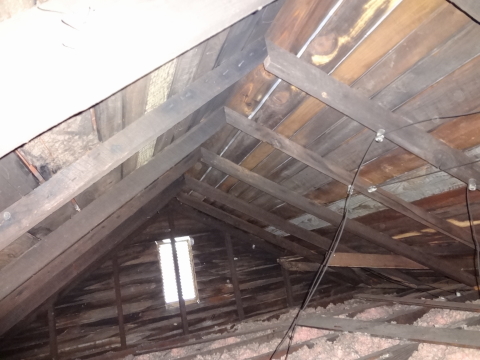
Another example of proper attic roof bracing technique.
In this picture you can see that a 2×4 was nailed underneath the rafters (catwalk style) to straighten them before the braces was put in. You’ll see braces put in in different ways but as long as it performs its intended function it is not a defect. It can be installed plumb or tilted but not more than 45 degrees in most cases.
Picture of ceiling joist bracing (catwalk).
At left we can see the 2×4 placed on top of the joists to brace them (catwalk). You will not always see the upright 2×6 on the ceiling joists if the joists are not expected to sag. Although it is good practice.
Without this lateral brace the joists would be very unstable to walk on. Ceiling joists over 12 foot should have a catwalk installed down the middle to prevent lateral displacement. It is good practice to brace 2×6 rafters over 12 feet.
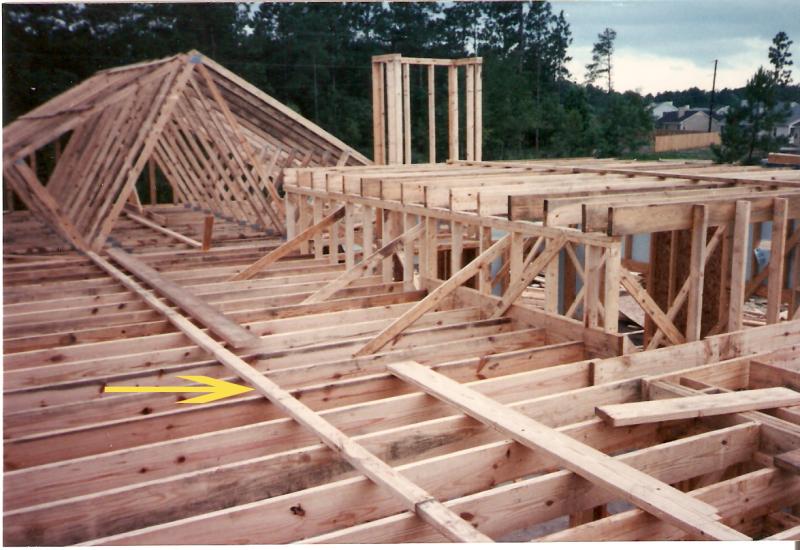
Example of typical attic bracing.
Picture showing bracing and collar ties. Collar ties are placed in the upper third of the span and help to keep the rafters from spreading apart. Bracing should to to the top of load bearing walls and not on top of joists unless it is directly above a wall. Rafter bracing should also be about every four feet just like the collar ties.
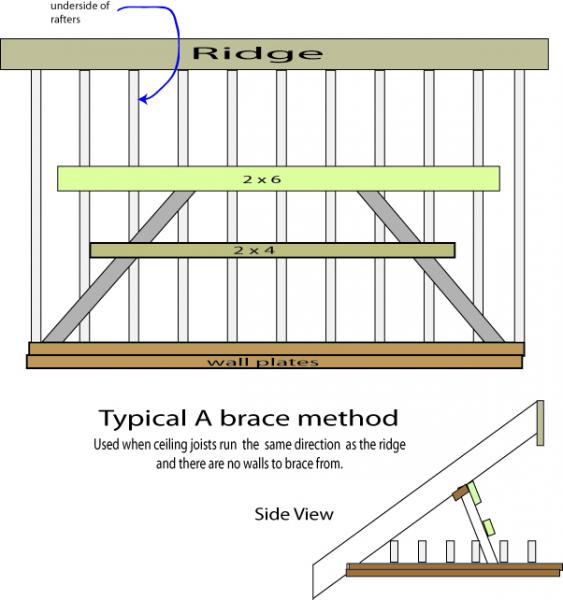
Example of an A brace roof rafter bracing.
Above is an A brace. It is used when the joists run the same direction as the ridge and there are no walls to brace off of. The bottoms of the A brace are located on the outside load bearing walls.
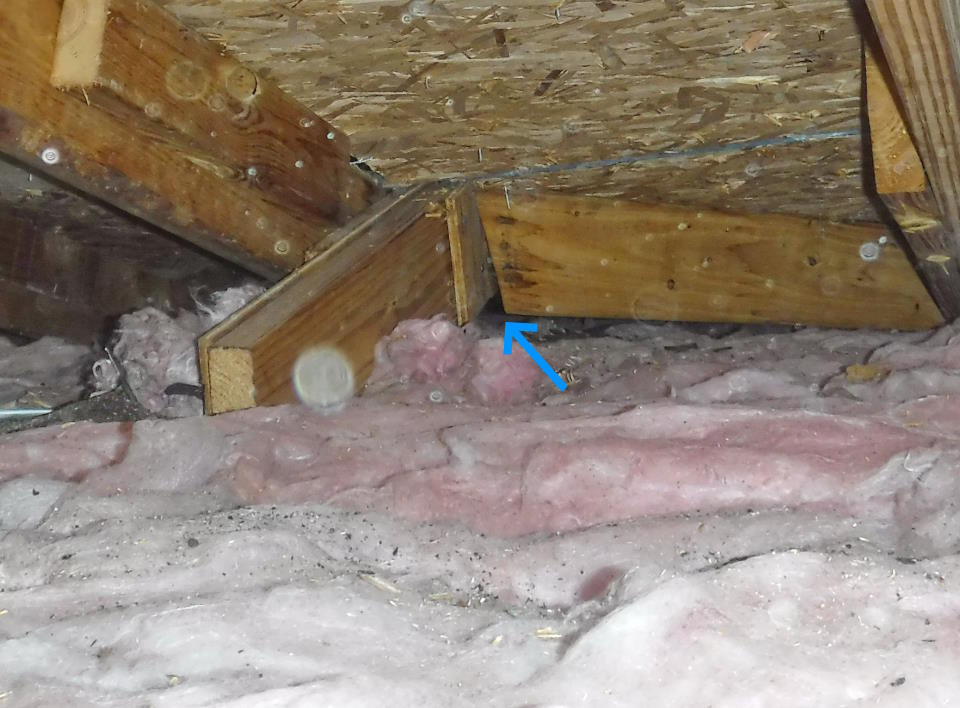
Picture show sagging roof at roof valley intersection.
In the image above you can see the gap at the rafter at the ridge (blue arrow). This roof has sagged substantially due to lack of bracing. The sagging roof was apparent from the outside too. There is a misconception out there that valley rafters are self supporting but that’s not true. In this case it would have been better if they had framed this section of the roof as a blind valley. Bracing this roof up will be difficult because it was built over a manufactured home. Since manufactured home roof trusses are not designed to support much weight; rebuilding this section of roof may be the only repair method.
The Valley Rafter
The valley rafter is usually supported by another valley rafter that extends up to a supporting ridge. If that is not possible then a supporting post can be installed at the junction of the two valley rafters. Sometimes the traditional bracing is enough to support the valley depending on the circumstances.
Open Cathedral Ceiling Design
The ridges of large open cathedral ceiling often have to be designed as beams. This is to prevent the walls from spreading outward. Typically the design of such beams are included in the architectural drawings. If no such drawings are provided then the beam should be calculated based on loads and proper design practice.
Now let’s take a look at what we find out in the field.
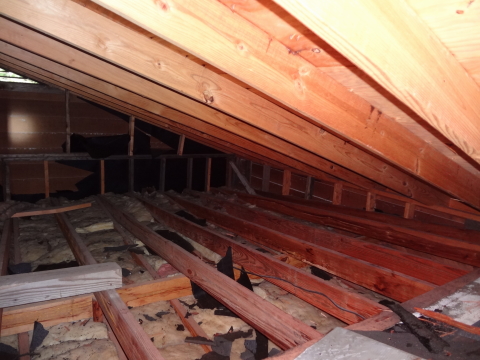
Here is an older home built in the early 1950's. It has no attic bracing and there is visible sag in all of the rafters.
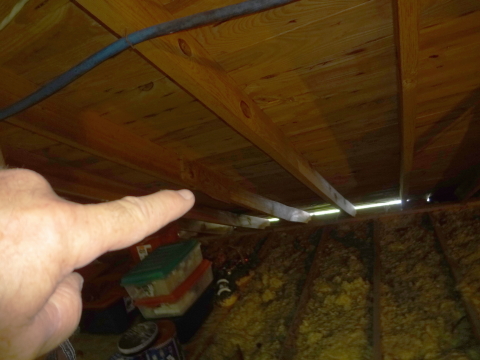
In this picture a broken rafter is visible due to sagging and no attic bracing. Home was built in the 1950's in Summerville SC.
Here is a section of the attic with no collar ties or attic bracing. At the time this home was built ( in the 50's) the type of attic bracing that was installed was at the discretion of the builders.
Picture of old house with no ridge, collar ties or rafter bracing.
Above is an older home built in Charleston SC in the early 30’s. Notice no ridge board. This was a popular way to do this in many areas and is not considered a defect as long as the rafters oppose one another. Other things to notice are widely space under sized rafters (2×4’s), no collar ties and no bracing. Even though this home has stood the test of time more attic bracing is recommended.
About Wind Zones
On modern homes depending on the particular wind zone area that you’re in, additional bracing for gable ends could be required. This kind of bracing braces the gable back to a braced wall or sheathed roof plane. Though there are prescriptive solutions typically these braces will be drawn out on the design drawings.
About Truss Bracing
Truss bracing requirements are included in the TDD (truss design drawings) that came with the trusses. Besides the TDD, trusses have to also comply with the BCSI 1-03 standard which is typically included in the TDD by reference.
Do you want to know more about roof framing. Check out my book.
Hi, good morning. I have a question. I have 2×6 rafters, 16″on center with a 12′ span from peak to exterior wall, about a 4/12 pitch. I added supports at 48″ from the peak (top 1/3 ) coming down perpendicular to the rafters to a strongback.
Should I have come straight down from the rafter ,perpendicular to the floor?
If so , what can I do to correct it?
Thank you
Thanks for your question Mr. Davis, I think the way you have it will be fine. All you’re trying to do with traditional framing is to prevent the rafters from sagging under their own weight and any loads. While bracing to a catwalk or strong back should be avoided there are times when it can work. The preferred way is to brace to a wall or girder. Hope this helps…..thanks for reading my post.